Monday, 30 April 2012

Once Upon A Tease

Amidst the pile of net that is still threatening to take up residency and apply for squatters rights in the corner of my front room I have been making way for another extra curricular project. Once Upon A Tease is a local burlesque group and myself and a small team of dedicated Costume students are busy creating the five corsets, bustles and accessories from the designs created by Yolanda Collins.

I have taken on the role of principle pattern drafter and have been helping the other girls draft their corsets up- the design I'm working through at the moment is a nice little challenge for me as it is a full body corset, something that I have yet to try. This is the design I will be making.


With a rather tight schedule and having to be ultimately responsible in guiding the shapes of these corsets I decided it would be best for all if we found one corset plate that worked for all and then enlarged the pattern with the help of CAD. This got us all to a stage very quickly where we could start to adapt the patterns to the individual measurements of the girls. I don't normally work this way myself, with the exception of the green metallic cincher I made last month but it is proving to be a method that works well if you need some quick results and the shape needed is not too complicated.
This is the pattern from Jean Hunnisett's Corsets and crinolines:


With my own pattern I had to take it onto the next stage as I needed to drape on top of my flat pattern to create the body corset that will go under the crutch like a swimming costume, but must still pull in at the waist.

I started by taking the flat pattern after I had altered it and making a half up in calico and putting it on my mannequin. Luckily the measurements were not too dissimilar to my artist. I had a fiddle and re-adjusted some lines as I can identify pretty quickly if something is not working in a corset. Next I used a block for knickers as a guide for how much crutch allowances I needed and draped the rest straight onto the mannequin. I could see the results were working really well. From the draping to the final pattern all I did was true up the seams and tweak the shape a little.


After this I cut in drill, transferred my markings in chalk (I used red which was very messy and rubbed off in areas on the white drill, I wont be doing that again!)
 Next- and this is my *cheat* for keeping the wrinkles down, especially with satin; I backed the drill to double sided fusible glue, the type that comes on paper and it has a honeycomb shape that melts into one fabric and then you iron to the other fabric, sandwiching them together. Followed by the satin itself. Here it is waiting to be tacked and sewn together.


The next update will be along shortly as it is already half constructed at my machine as I type. I will be leaving a side seam open as it will have a strong zip inserted to enable the dancer to remove it during performance. But so far I'm quite happy with the relative ease of making it into a full body, it's something that I thought would be far more complicated but this has given me the confidence to go straight into some more challenging shapes on my next sample. I found the combination of part flat draft and part draping to be really liberating and is a technique I have no doubt I will be returning to. Of course I wont really know if it is a success until the fitting, and it is a slight worry we have gone straight into top fabric as there was just no time for a fitting, which is why I have cut the gusset and then left the possibility for enlargement of up to four inches front and back to get the fit right. Fingers crossed then.

Tuesday, 24 April 2012

In the end it all comes down to pink and sparkles

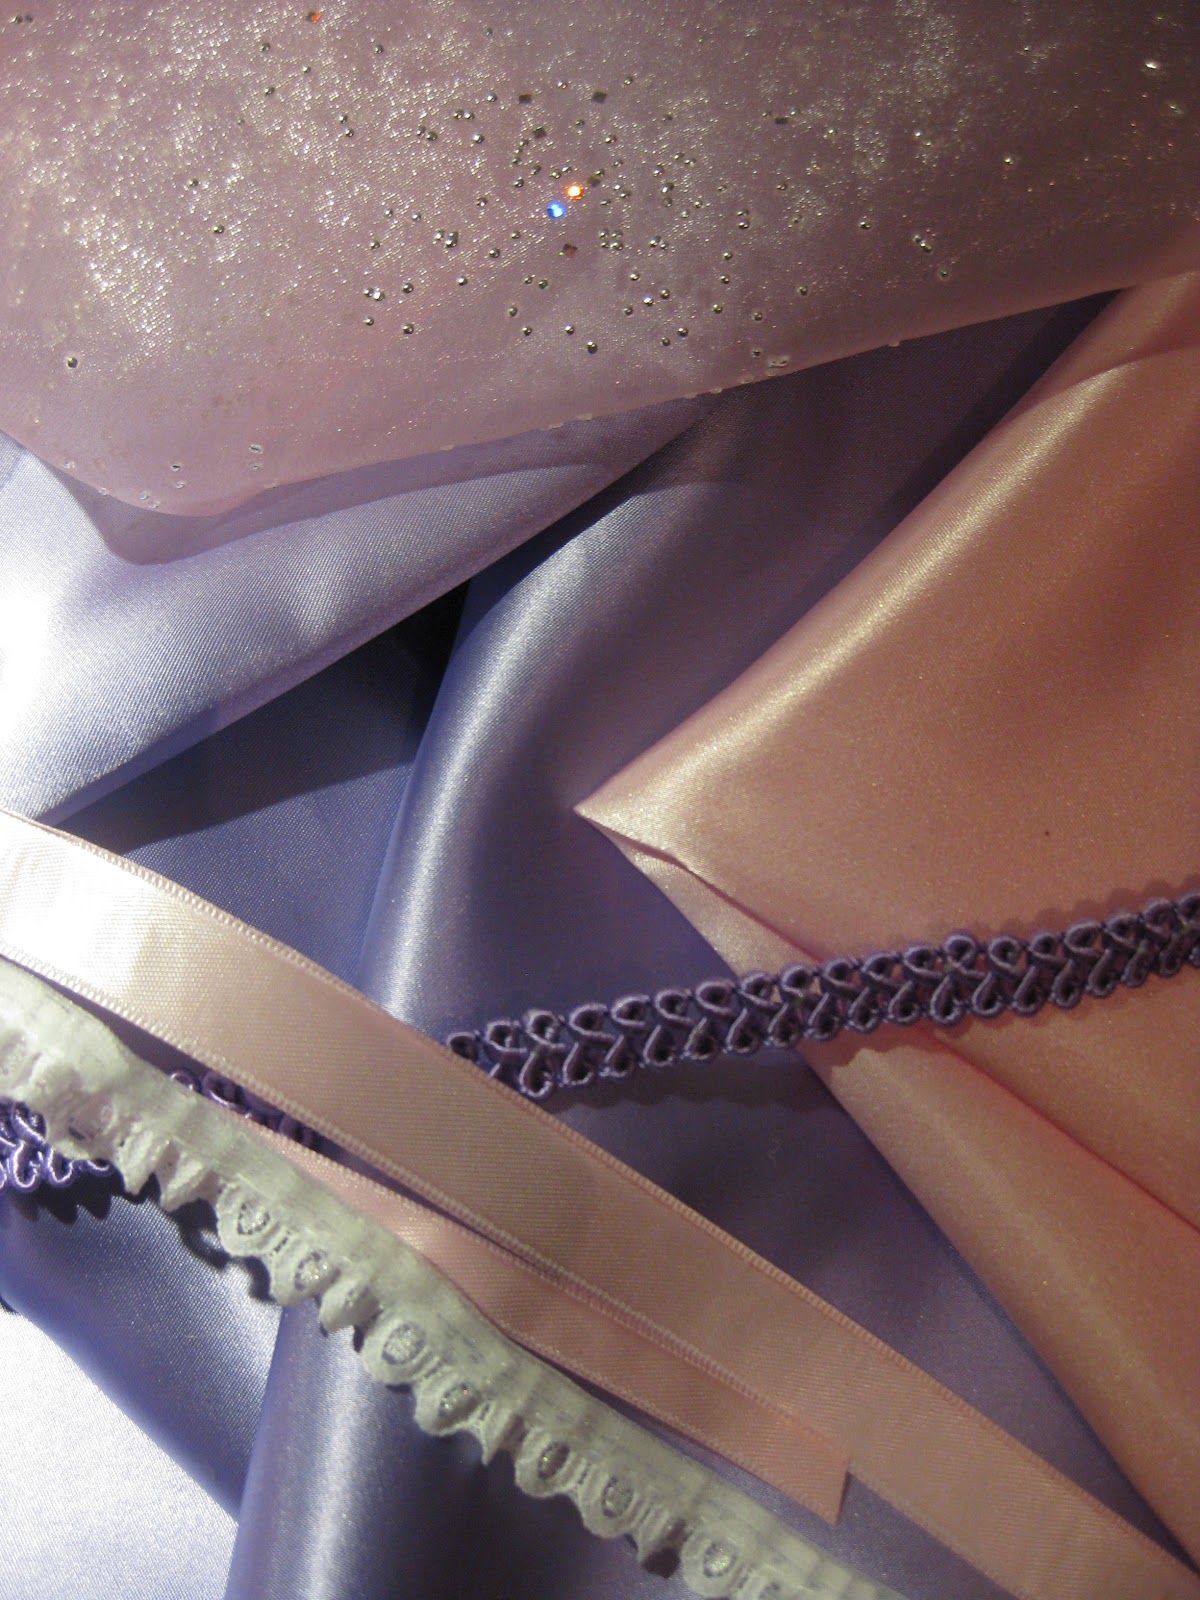
Okay, deviating slightly from my large workload to whip together my take on Disney's Rapunzel dress. I say my interpretation because the materials had to be sourced from my local shop as I don't have time to fuss around with ordering and it needs to be quick and cheap. In the end I went for some acetate satin in pink and lilac, some sparkly pink organza and some ribbons and lace.

Here it is all laid out.


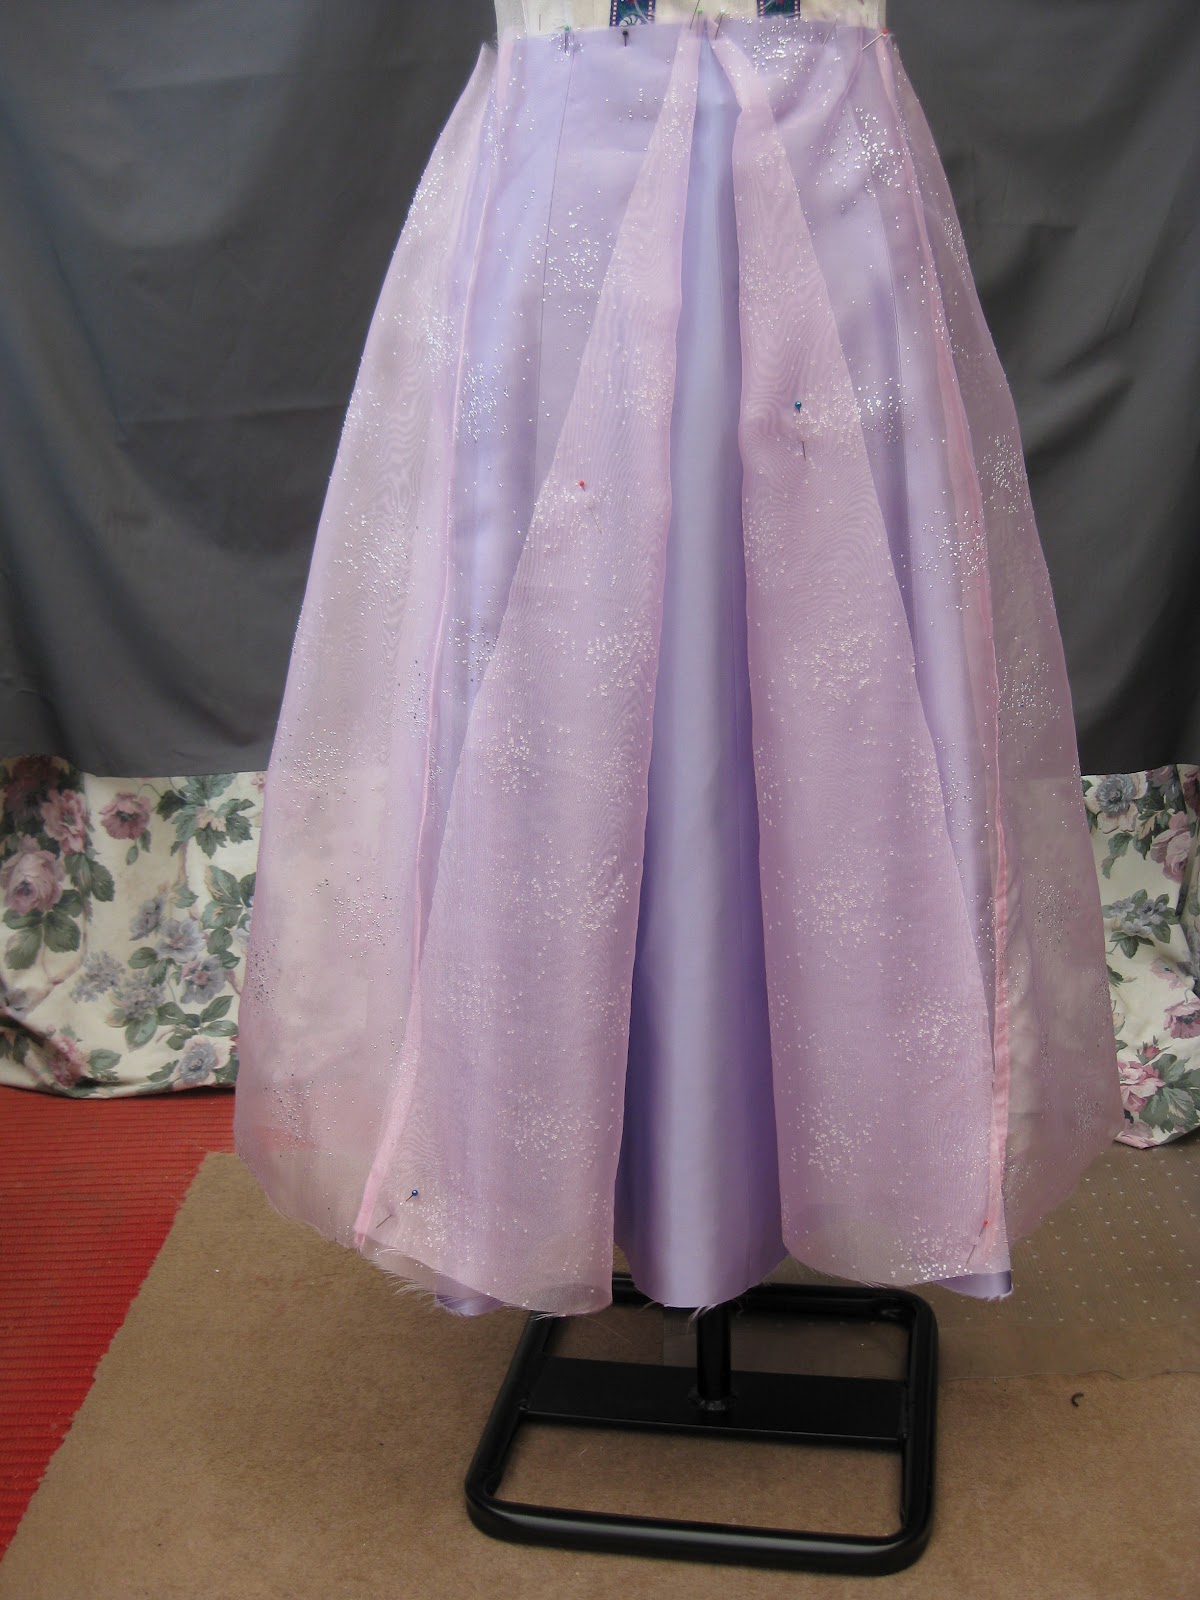
 I am making the pattern myself, so as a nod to the ballet tutu I used exactly the same shape to make the skirt except there will only be a waistband and no basque, 5 panels for the satin and 7 for the organza. Shown here pre-overlocking and pre-gathering so the organza is not sitting right on top of the satin as it will do when gathered, also the mannequin is bigger than my daughter.
So far I'm not happy with the french seams used to join the panels of organza- to keep it all flat I decided to top stitched the seam down as well, which has left some pink 'stripes' on the top skirt. I will cover with lilac ribbon to combat this, baring in mind this is a speedy operation.

Next I will be looking at the basque and sleeves but this will have to wait for now as I'm making this up in my 'free time' which is a bit sparse currently.


Finally, an artists impression of the Disney character wearing the dress to give the general idea- it's times like this that makes me wish I had a grands worth of an embriodery machine sitting in my work room(<sigh>).

The Snowy Mountain

Well at least in miniature; ever wondered how much tulle goes into a romantic tutu?
Nearly 12 metres and over 40 panels.

Its soft to work with though, not quite as tough on the hands as normal net, so it is piled high at my sewing machine currently waiting the time consuming process of joining the layers together.


This is turning out to be a week of trying to catch up with everything, so its not just the mountain at my machine I'm trying to get through. The main tutu more or less needs to be finished by this time next week ready for decoration, which will take a long time to apply successfully, but I feel as if I am on schedule so far, which is good because I still have a corset to make as part of the set some of us girls are making for a local burlesque troupe.
Just to make things extra interesting I've added on yet another little side project in the form of a Tangled Rapunzel dress for my daughter as there is an impending fancy dress party on the horizon...I have a few pictures to follow in the next post.

The further into the project I get the more I'm thinking about the 'self directed' aspect- I want to take this beyond what we are being taught and really own it, the way I have done with my other areas of interest. I have started collecting books(my secret habit) on the subject and spending time rifling through the interwebs and watching performances, live and on DVD in a bid to educate myself further and to see what else is out there.
I'm thinking I would like to draft up another bodice and/or make another skirt in a different shape or out of a different material, but this will really be dependant on time. Even if I don't get around to more during the unit, I have the bug now and I want to explore and build upon my knowledge base, which means that I will keep making and understanding more each time.

But for now I return to the layers of soft tulle, which already are taking on a distinctly magical feel.

Sunday, 22 April 2012

Corsets Photographed

Whilst I am busy at Uni I still have more than one or two ongoing projects to keep my hands busy.
I will admit to having a bit of a shopping spree of late. This spree involved the purchase of another tailors dummy- this time vintage but fully able to use for draping and much closer to my size which means I have been able to get some better photos of some of my corsets- still not as good as having a professional shoot, but that will come as soon as I can get round to organising it.

Next was a truly indulgent purchase of a second hand industrial 4 thread overlocker with ruffler, its not here yet, but I'm hoping it will be this week. This is something I will need for my own business so it was only a matter of time before I needed one, I cant wait to have one at home it will make several things so much easier to accomplish.

Anyway, without further ado some more corset for perusal.

The first one is based on a pattern of a 1798 pair of jumps from Jill Salens Corsets book. I drafted from scratch to my measurements and made a mock up first. It has a light amount of boning in it and squashes the breasts upwards to give s the slightly less severe silhouette at the end of the period. I have stuck close to the original materials, using a pure silk taffeta- which was lovely to work with, interlined with cotton drill and lined in pure linen. The boning casing are cotton drill and silk dupion and all the ends of the lacing are finished with gold coloured aglets. I have also made a black chemise made of cheesecloth and edged with cotton lace and broiderie anglaise threaded with the apricot ribbon(not pictured) and plan to finish the costume with a cartridge pleated skirt made from some lovely Liberty wool in burnt orange and a bum roll for shape, but have not had the time to make it up yet.


While the mannequin is not bad because it is so rigid you don not get the correct effect at the cleavage, but this gives some idea.


Next up is the 1911 long line Titanic era corset. This was done as part of a sew along and entered into a competition- it unfortunately did not win but there were so many beautiful corsets on display. It is constructed from a single layer of fabric with a waist tape and applied bone casings to the inside as the corset would have been made back in its original time. However the fabric cotton backed satin I used, although a good quality fabric did not quite stand up to the one layer so is not really thick enough. Next time I make a corset from this era in one layer I will be using some coutil or spot broche. The long slimming line of the corset is flattering but the aim is not to have a really small waist at this time compared to the rest of the body. Next time I would either shorten the length slightly as it was a bit too long or lengthen it to make a corset dress perhaps.


The corset will pull down nicely at the sides once the garters are attached to some stockings!


I have still yet to photograph the two metallic corsets I was making last month. They were both finished and worn and most importantly enjoyed and admired.
I hope to get them up this week but once again the mannequin is not really doing them there full justice, and neither am I.
So definitely need to find a willing photographer..


As usual more photos of these corsets can be found on my facebok page:
https://www.facebook.com/#!/IllustriousCreationsCostumeCompany

Bodice Construction Cont.

More photos of the construction...

At the moment now the bodice is assembled the boning channels for the seams have been made up, measured and herringboned down to the S/A. Next step is piping and finishing the edges.


 We have also been learning about applying decoration to bodices and plates, what looks good, and importantly how to apply it so that it looks professional. I will have some photos of my sample decorations once they are finished.

Little Shop O' Horrors

Here they are then; all the mistakes I am making along the way, so I know what to avoid next time.


1.First and most importantly the biggest of my mistakes has been not to write up all my construction notes as I go along. Which means that when I have gone to look back at my scribblings when they were not as fresh in my mind I have missed things or could not clarify what I meant at the time. This has resulted in some of the mistakes I have made since.

2. Working with white- I have already said it is a challenge I am enjoying but with all my efforts to keep it clean somehow there is still a black mark that I think may have resulted from rubbing my eyes over my work and somehow ending up with what may be mascara on the white. Luckily it is on the inside, but do I dare try and remove the mark?


3. A mistake made as a direct result of no. 1. Not reading instructions properly before ploughing on ahead. Here we can see where I have trimmed away the excess seam allowance up to the design line. I did this for every seam. Lo and behold in my notes, underlined no less, it says "except for side seams" meaning I trimmed away fabric that may have been needed for alteration. This is actually quite a serious mistake. Having had a think about it I decided I had come too far this time to re-do an awful lot of work. Luckily for me, this costume will never be altered, instead it will sit looking beautiful on one of my mannequins. If this had been a working costume however, I would have had to re-do the work, as the costumes, especially the core costumes often get worn by more than one artist and there needs to be alteration space in the costume. This was a good mistake to make now however, as I am unlikely to do it again.


4. Test fabrics on iron first. Classic mistake. I have made this mistake before and will probably ruin a few more pieces of fabric before my career is out. Here, after making up the waistband for the romantic tutu I managed to melt one of the elastic inserts with my domestic iron. There is no saving it as the melted edge is hard and would cause much discomfort next to the skin of the dancer. Thankfully I can replace the piece without too much trouble. But I now know to avoid the elastic at all costs with anything hot.


5. Another mistake(edited to be added after the original post), although I have no photo. Once I had sewn down the piping on the bodice, you then trim the SA to 3mm above the design line except you do not trim down the SA at the CB placket. Well I did by mistake. Although this reduces bulk it does not help if you need to alter the CB panel to allow more room. Keeping the SA hidden inside the placket allowance just makes it easier when it comes to the alteration.

6.-(another edit, no photo) I have noticed that in general this fabric is very tricky, as I am sure I have mentioned before. The over handling of this fabric is now beginning to show. I have been very, very careful with it, but because it is a sample piece, and therefore it has been constructed in many stages over quite a long period of time, it is starting to look a little withered. This I feel would ultimately be remedied the next time I make a bodice as I now know all the stages and should be able to make one a lot faster, which means the fabric, if handled with care should remain very crisp.
That's it for now, but I am sure to accumulate a whole many more along the way.

Learning From Your Mistakes

Before undertaking my degree all my construction skills were self taught and everything was on a basis of trial and error.

Learning to understand commercial patterns, getting my head round the working of a sewing machine understanding the qualities and limitations of different fabric. One of the big advantages I have aways had on my side is the amount of time I spend practising my skills. The moment I started making costumes and learning about the history of clothes I have been immersed and because of this I spend many hours a week creating and learning and improving. It has got to the stage now where If I am not constructing something after a few days I can get quite agitated but I see that as a good thing.

When I look back at old projects that I have not got round to completing for whatever reason, I can always see straight away how much I have improved; which means more often and not the project is a lost cause because as I strive for the highest standards in my work so the old work is just not good enough any longer.

All of this is relevant to SDP. Ballet, and indeed my other interests in historical and corsetry are all what I would consider to be at the high end of costume making for performance- in terms of the level of competence needed in their construction, and as such, demand exacting standards. I talked in one of my last blog posts about being honest about my work and where I am at and this is no different.

What I am really learning in this unit is that for my work to be at a professional standard then I will need to carry on perfecting the skills of my trade and taking on board everything I am learning from my tutor-most of which is privileged knowledge, and then to just keep on going, it is more than a good opportunity. 

The romantic tutu we are making is the first one I have ever made, right now, taking all the experience and hours of practise I have behind me I am giving it the best I can, and I feel like it is a good example. But in truth, just like my other old projects, in time I will look back and wonder how I ever thought it was more than "just okay" as an example of a professionally constructed ballet costume.

So really this post came around because at the moment I have the luxury of taking my time to get everything perfect with this costume, and I have been. But I have also made mistakes, but I believe that mistakes are good, necessary in fact. I remember making a huge mistake last year when constructing a costume, and wasting some very, very expensive fabric. Yet I know, painful as it was at the time, I will never make that mistake again.

This is leading me to keep a visual catalogue of the mistakes I make on this unit and keep on adding them so I can look back at the end and see where I went wrong with the intention not to repeat my follies.

Yes, this may seam trivial, in the creation of something artistic will it really matter if I have a stitch line that is 0.5mm out? The answer is yes it does. The whole point of a ballet costume as stated by Dexter is that it should appear to look "as if it was made by fairies", and this comes down to the level of careful construction and eye for line in the application of decoration as well as how you treat the fabric.
It follows of course that if I am going to expect that standard for the ballet costume I make, then I will make all my other costumes to the same standard and it is this that will bring my work up to professional quality.

It is the same for my corsets. Even though I am getting better all the time, I know it is not good enough to sell to the kind of clientele I want to target. If I want to create individual pieces of wearable bespoke art and charge the kind of price that comes with all those hours of work and dedication then I must be self critical and honest. Which once again all starts by to owning your mistakes.