Monday, 5 November 2012

JAA Week 5: Return To Berrington

 
A Closer Inspection
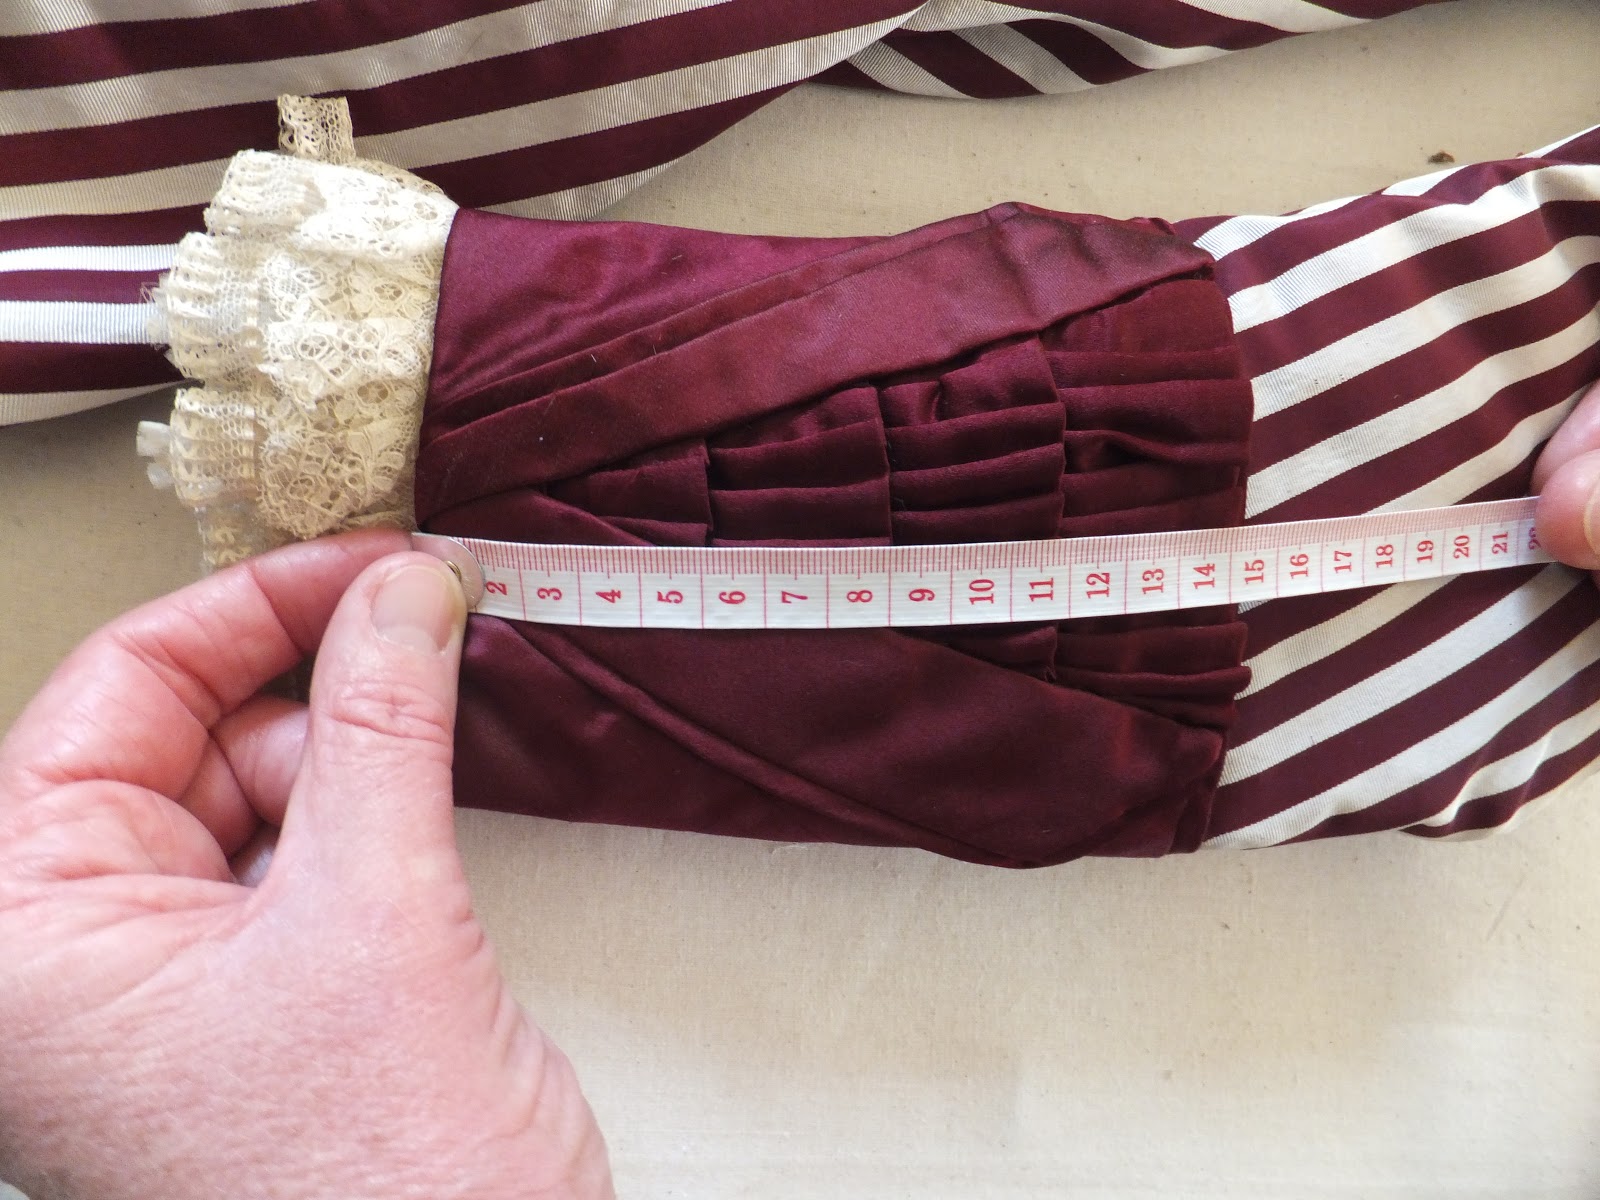
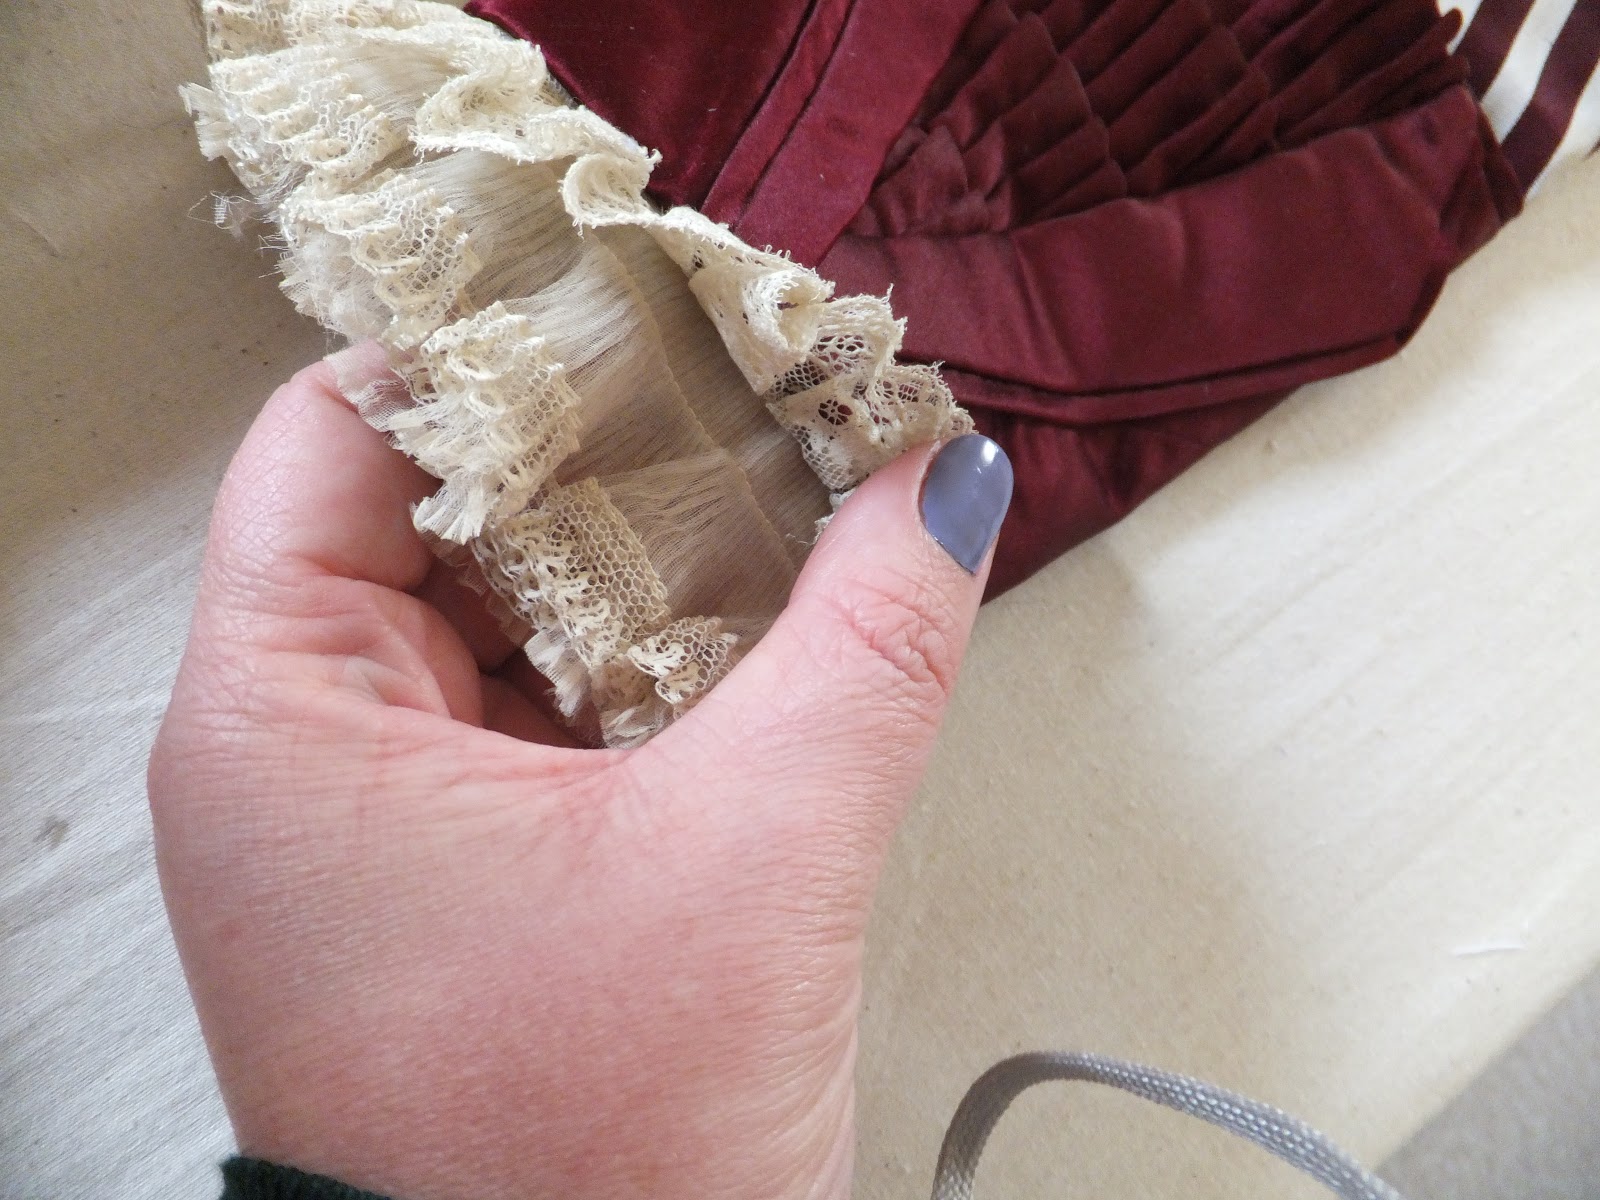
Okay, so the toile is done and I have a hundred questions about how the dress is finished, i.e, how is the collar attached? How are the cuffs constructed? and what do the lace frills look like close up? These and many more needed to be answered on my trip.
I'm very glad I chose to get the toile ready in preparation as I have been able to get a realistic expectation of the proportion of the dress and how it fits together which means I can concentrate on the finer details of the original garment.
On seeing the dress again I was not disappointed. It is a long journey to Berrington, now for the second time, but this first hand research is absolutely imperative to the direct outcome of how successful my reproduction will be.
Along with Althea, the collection curator, I was able to spread the dress out, take photos and touch it, going over all the construction details with a fine tooth comb to reveal their secrets. I thought I would write and sketch during my time, but this in fact did not happen. I have always been blessed with a very vibrant photographic memory, so instead I focused on getting a real grasp of the garment from a sensory perspective; the textures the colours and so on. I discussed with Althea how different areas where constructed and we both learnt many new things, including how the hem was finished and how the cuffs are attached and I really got a good picture in my head of how I was going to proceed with my own version. All the time I took lots of photos of all the little details to have a solid record that I could refer back to, for me, the detail photos are a much better source of accurate information than anything I could draw or describe.
Althea seemed suitably impressed with my toile which made me feel confident and ready to get on with the real deal. The trip also helped me make that final decision on top fabrics as I need to purchase my material for the start of the next week of the project.
I really cannot stress enough about how much this visit has helped me. There is no way I could produce a faithful reproduction without the information gathered from looking carefully over the original which will in turn give me the information to make better decisions about my own work based on relevant research. Of course, I will not be able to copy all the fabrics and materials/ lace etc. exactly, but I will be able to explore my choices more efficiently, use my own independent judgement, hopefully with a very successful outcome.
Here are the photos I took on the second vist- there are quite a few of them, but as I am not printing them all off in my workbook I am putting them up here.


Empire: The Italian Renaissance

Next year at Easter I am attending a new LARP system in the UK run by Profound Decisions. Details, for those who would like to know more can be found here.

The group and nation I am in requires costumes to match the Italian Renaissance period (although it is essentially a fantasy system so there is room for movement), drawing heavily from The Borgias for inspiration.

I have started to collect fabrics and trim for the gowns I am going to make; so far the makings of one for my daughter and two for myself plus a chemise each. Realistically, I need to make two for my daughter before the first event as it is a four day event and she cant keep anything clean for longer than five minutes. Also, being Easter I anticipate the weather to be cold, so i will need to think about a cloak each as well.

Normally I would grab something from my ever growing costume wardrobe, but PD have emphasised the importance of accurate costume for this system, so grabbing a felt cloak out of the cupboard just wont do.

I have my reservations, that's a whole lot of extra work to fit in around my final year, so i will just see how I do.

Step 1 is gather fabrics, then I will move on to drafting the patterns. At least the patterns are simple, and once I have done one each, they will only need slight modifications for any further gowns.

But I am very excited. I love this period, and I'm looking forward to using all my skills to wow people on the field, I'm also looking forward to finally doing some cartridge pleats.

Here are some snaps of the fabrics so far. I found some amazing and very expensive trims (£10 p/m) but they have not photographed well.

These greens are for my daughter. Stone silk skirts, silk organza chemise (although she will be getting some brushed cotton versions too for warmth), diamond brocade bodice(synthetic but good quality) and the amazing embroidered flower fabric for elaborate renaissance sleeves.


My fabric for gown 1. Similar to the embroidered version above, although not quite as nice, I had this piece a while since I bought it in the sale. I have more than enough for the main bodice and sleeves and will probably team with cobalt blue powerwoven silk dupion skirts. Trim etc, not yet purchased.
 
The blue/gold silk/cotton brocade has been in my stash for ages. I got it for £1 p/m at a closing down sale of a local fabric shop. It is not really period (well tbh, none of my fabrics are- but this is NOT reenactment it is a fantasy system, my silhouette will be right and the fabrics are very good quality, this is good enough for me). The mustard wool has a beautiful drape, there is silk for a chemise akin to a heavy habotai, and plain navy powerwoven dupion. Plus the beautiful trims. I cant decide whether to have a brocade bodice, or wool with the left over used for the skirts(as I have enough for both options), the plain is for the sleeves as the will be adorned with trim and pearls etc.


Some inspirations photos from the Borgias:


Ideas for cloaks/coats


Sunday, 28 October 2012

JAA Week 4: The Toile

All In A Toile


Making the toile has finally come around. I have had a week and a half to cut and construct the mock up of the dress ready to bring it with me to my visit back to Berrington Hall in Herefordshire, to spend some more quality time with the original.
 
 
I was undecided for a few days as to what fabric to use for the mock up. I wondered whether it would be more beneficial to make up in a cheaper satin/ silky fabric. I took the concern to one of my tutors who advised to mock up in the traditional calico, their reasoning was that calico is easy to work with and cheap, the real dress will be costly enough without adding extras on top, and if a piece was cut wrong, calico is cheap enough to be replaced easily, not to mention the fact that it is easy to press sew and manipulate. So once that was cleared up I got on with the pattern cutting.
 
Now, I will happily admit that transferring patterns and adding seam allowance is my least favourite part of any costume making that I undertake. It takes a long time as it has to be accurate, and I find it fiddily and messy. I used a combination of blue and yellow transfer sheets- the yellow I could barely see and struggled when it came to following the line when sewing up the pieces. Also, because this is a practice run, I followed the method of adding a one inch seam allowance to all seams which is very common in costumes, as it leaves room for alterations. I then added some tacking along bottom/top design lines and CF/CB etc. so I can see the shape on the right side of the dress.
 
 
Sewing up the dress itself went very quickly. Supprisingly, most of the seams fitted together easily and there were only a few minor discrepancies in the pattern, this shows that Janet Arnold's pattern is quite accurate and furthermore, my scaling up of the pattern was a success. There are no real instructions for how the pieces fit together, aside from the drawings and my photographs of the original so I used a combination of my experience and common sense and I avoided trying to force anything that did not look right.
 
 
Considerations on Historical Shape
 
 
With the toile sewn together I can finally see the piece in 3D and certain things stick out a mile that I find fascinating about the historical aspects of the original garment.
 
Firstly, I can see how far back the shoulders are set, compared to my modern mannequin shape. This is in short the result of corsetry, creating  an errect figure, from a young age, where the shoulders are pulled back, creating a narrow back and broad chest- quite different to the often quite rounded shoulders of modern women today.
 
Secondly, the proportion from the top half, waist, chest and shoulders is huge compared to the hips. This is a particular enigma. I already know, from looking at extant examples of corsets/ dresses of this period that corsets were long and tight at the waist, following down to encompass the low hipline; this supported the tight fitting cuirasse shape of the natural form era, by creating a long smooth line. Yet with my toile I can see that there is a huge difference between top and bottom halves of this dress, equivalent to being a modern size 8 at the bust and waist and then jumping to a size 14/16 at the hips. So does this mean the original wearer of the dress was very disproportionate, perhaps as a result of restrictive garments impeeding growth, or was this particular example garment not fitted tightly at the hips as I would have expected? Maybe there was extra garments/padding supporting the silhouette of this dress, giving the impression that it was tightly fitted to the hips, to give the wearer a more desireable and fashionable silhouette? I am inclined to guess the garment was fitted over a hip shape as the seams shape at the hip line supports this idea. Other than this though I may have to ask others with more knowledge than I have on the subject.


The mock up gave me a chance to try out the ruching at the front, I used silk thread but this turned out to be too thick, I also inserted the collar, pinned on the sleeves and tried out the cuffs, which came up too short(this will need adjusting). I also had a go at the decorative panels, seen above.
 
 
All the while I have been adding to a rather extensive list of questions that I will need to answer when I view the original, so that I can make sure that I am constructing and finishing the garment as close to the original period techniques as possible. I am quite pleased overall with the toile result and feel quite confident about tackling the reproduction of this garment in the expensive silks.
 
I have decided however, that once I make the slight changes to the pattern to make sure it all fits together correctly, that I will be re-tracing out all the pattern pieces, adding 1.5cm seam allowance and then cutting the top fabric out, without the need to tracte out all the seams. I will of course need to transfer other markings such as darts etc. but this will reduce the mess to the w/s of the fabric from the chalk and reduce the need for such large seam allowances, that are not period and will only need cutting down otherwise.


Sunday, 21 October 2012

JAA Week 3: The Pattern


Scaling Up the Pattern


With the majority of the undergarments done, I can now move on to finishing the pattern, ready to make up the toile before I go and visit the dress again.

Thankfully, during the preparation stage of this project (over the Summer) I have already drawn up some of the pattern. For the competition, the garment has to be recreated to its original dimensions, which means scaling up Janet Arnolds given patterns to their full size.

To do this I have purchased some inch dot and cross paper and it is simply a case of counting the squares and using my eye to freehand the shapes across the paper, making sure the pieces look correct.

The dress has a centre front split from the hips to the collar (no CF fold), a large side friont with two long darts and a fish dart, a side back and a half split, half folded centre back with box pleats and bustle. There are also two part sleeves, a collar and large pleated decorative panels to add around the hem and finally, a train graduating from the side back to the centre back.

I quite enjoyed the challenge of scaling up the pattern, it is nice to finally get a feel for the real proportion and length of the pieces and also to be able to judge with better accuracy, just how much fabric I am going to require.

The patterns have been drafted minus any seam allowance, and at the end of this week/ next week when I construct the toile I will be giving one inch seam allowance and transferring the pattern to the toile fabric using a tracing wheel and transfer paper.

I will also be copying all the pattern pieces again to use for cutting out so I will be able to keep a master copy of all the pieces as there will inevitably be some discrepancies in the pattern that will need to be adjusted once the toile has been sewn together and recorded and changed on the master pattern.


I have only included one picture of the scaled up side front of the dress, as the patterns are hard to photograph clearly.

Saturday, 13 October 2012

JAA Week 2: Underwear

Undergarments Galore

Another full on week making the undergarments and under structures to create the right silhouette for the dress.

 I have been using original patterns from The Complete Guide to ladies Pattern Cutting, 1883 and Harper's Bazaar 1878 which have been assembled and edited in the Frances Grimble book "Fashions of the Gilded age, Volume 1".
This book and its subsequent volume deal solely with the natural form era c. 1876-1883, the period my dress is from. This small era in fashion history concerns itself with the cuirasse bodice and the Victorian *polonaise* (a Victorian take on the dresses of the 18th c by the same name) where the panels flow in one piece, close to the body from nape to ground. The swag from the first bustle period is still evident, and although bustles are still worn with the fabric gathered to the back from the front the female form is revealed from neck to hips- something which had not been seen since the beginning of the century. The corsets of this date are mid bust and very long, down to the hips, with small wasp waists creating the perfect foundation for the bodice. The spoon busk has also been invented in this decade and encouraged a slightly rounded belly shape.

For my unit I am making three undergarments from the period, adding to the two pieces that I had previously made. These items will hopefully work cohesively together to create just the right shape to support the dress- but ultimately I won't know until I get the toile up and on top of them over the next two weeks- it will be at this stage where I will consider the success of the garments I have chosen, and if they are not right, I will consider other alternatives from the period.


I already had made a set of drawers from the period and a small muslin hoop skirt, dated the same year as the dress (1878). Unlike the large crinolines of the 60's this skirt has a straight front with no steels and  the steels in the side and back are small with the emphasis at the CB, serving the purpose of keeping the skirts away from the ankles and helping them to fall in a straight style. Initially it looks quite square from the front, but you can see from the photos how adding the petticoat helps even the shape out; once the full weight of the dress is on top I think it will look just right, but this is one area where I'm not completely sure and I will have a better idea after the toile stage.

So on to the Makes


So what I have been making the last two weeks is a Dimity bustle, a petticoat and a train.
 
 
The bustle or tornure gives the shape to the rear for the swags of the dress to drape on nicely. This one is long and not too large made of cotton and crinoline steel. it has added ruffles and flounces at the bottom to help puff out the shape.
 
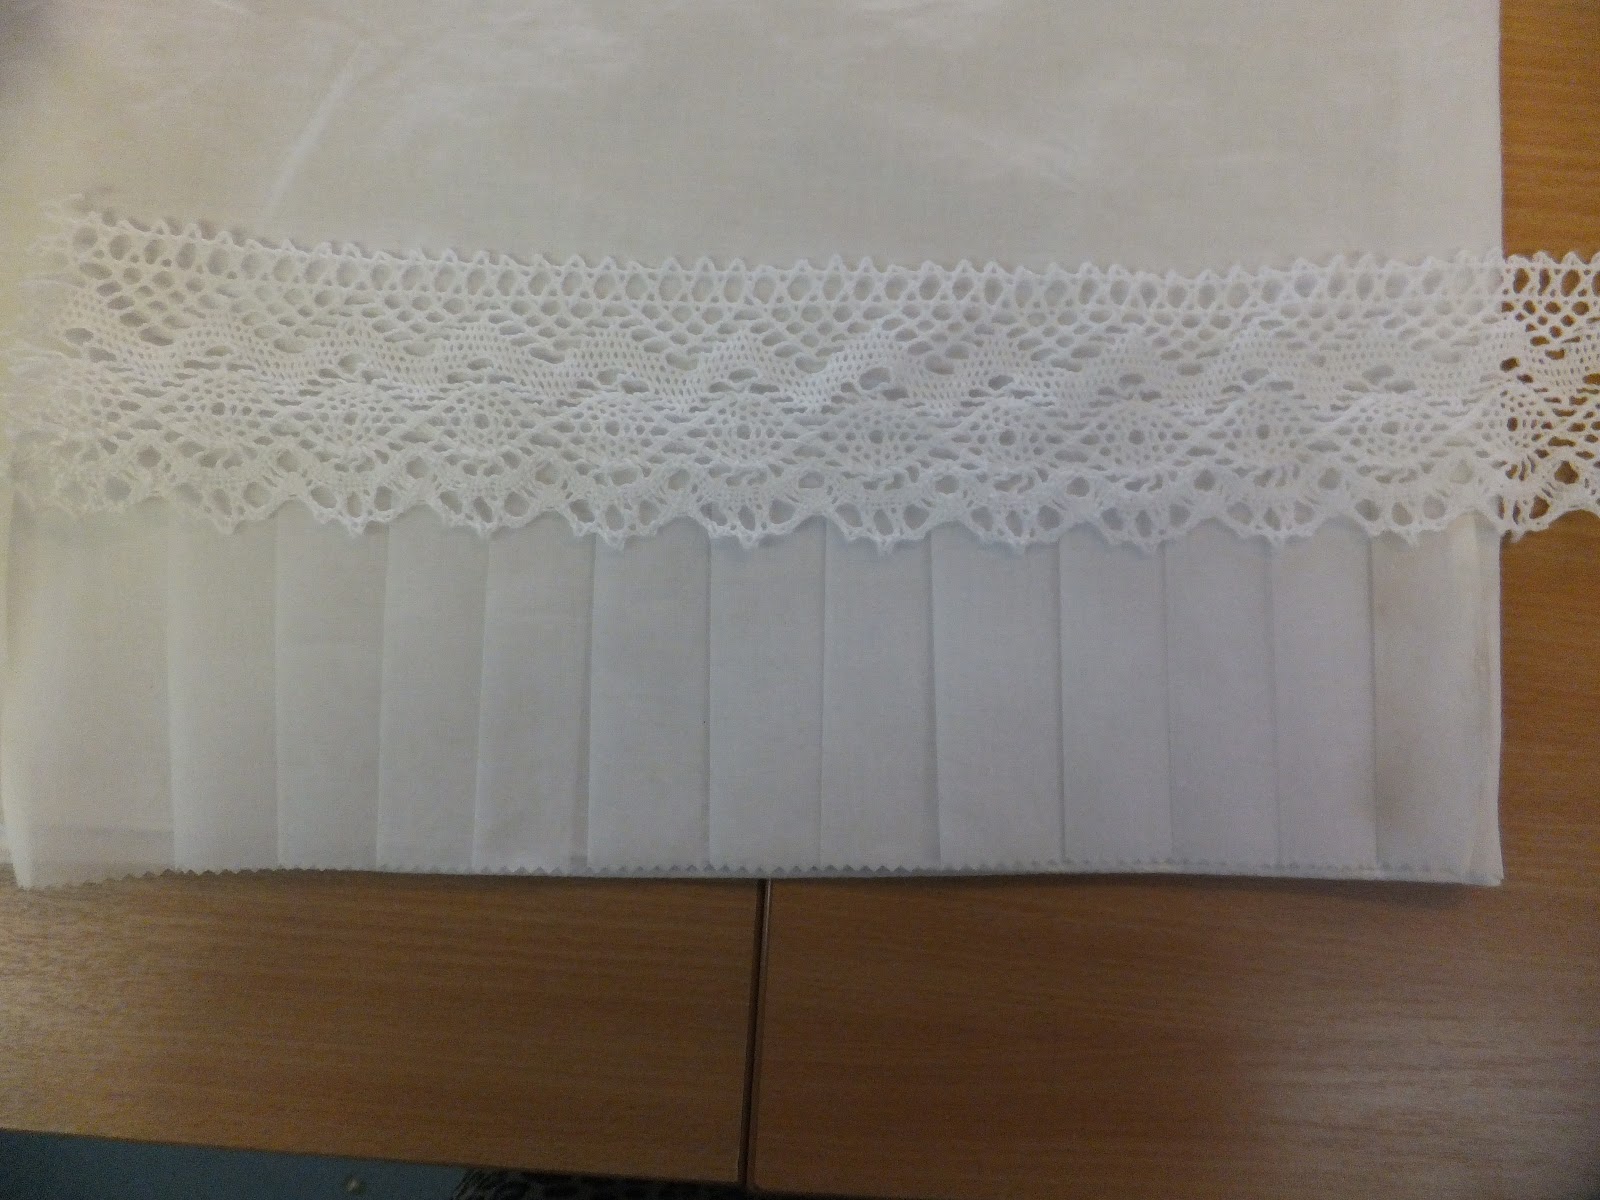
The petticoat has the straight front of the period, a large flounce and a gathered channel to draw all the excess material to the CB. I used period techniques such as fork pleats at the bottom and a lace insertion to give it an authentic feel.
 
The train itself is not yet finished; it is cream whereas the rest of the undergarments are white. this is because the dress has cream lace and organdy frill at the hem and the train is the only undergarments that touches the floor, which mean it may be seen, so has to match. It will be finished with cream silk edged ruffles from top to bottom, with the last few ruffles in the same satin as the dress. The train gives the last 'pouff' to support the swags of the dress and will also act as a dust mat, with the train of the dress resting on this train instead of the floor. It will be finished off with wide heavy cream lace to give it a grand look.


Period Techniques:

With having to pleat such a long length of organdie, I used a technique known as fork pleating as demonstrated in the following Truly Victorian video.


http://trulyvictorian.com/videos/ForkPleats.MOV


It made the process very simple as the turn of the fork measured out the width of the pleat each time, and did the turning for me.


For the Lace insetion I referred to a book from my own library Called Authentic Victorian Dressmaking Techniques which details the process.


http://books.google.co.uk/books?id=z8ajx5DkSJQC&pg=PA114&lpg=PA114&dq=victorian+lace+insertion+method&source=bl&ots=_upu4TCS5E&sig=yQjAvHw3FLY0tfkv3azvlEJi7AA&hl=en&sa=X&ei=Ldy9UL_MBZSp0AXz64BI&ved=0CD8Q6AEwAw#v=onepage&q=victorian%20lace%20insertion%20method&f=false


Outcome
 
 
I have really enjoyed making the undergarments for the project. For a costumier, this is a fundamental skill and basic building block of any costume. You need to make sure you have done your research for your period and therefore are creating the right shape. Prior to this project I have made several corset and stays from different periods and a set of pocket hoops and bum pad, so it was nice to make the bustle and petticoat. the patterns were easy to follow and I felt confident during construction.
 
I chose robust fabrics and materials, just as I would for a stage costume, so that these foundations can be used again in further projects.
 
Moving on, I hope to hold a decent collection of undergarments spanning different periods so that I can have them on hand when I am creating further costumes- next on my list to tackle(when I have the time) with be a full cage crinoline of the 1860's.
 
At this point the train has not yet been completed, mainly as I need to move on to the toile to keep up with my planned schedule, but also because I hope to use some of the left over fabric of the dress at the bottom frills, so that if it is seen for any reason (as you might expect from sitting down for example) that it merges in with the top garment, so to minimise the chance of it looking out of place.
 
 
I still need to decide if all the undergarments work towards creating the right shape for the dress, this is something I may know at the toile stage, or it is something that I may not be sure about until the final finished dress is on a model with all the undergarments as well.